The post Efficient 3ds Max Modular Modeling for Architecture appeared first on Ejezeta.
]]>
Master 3ds Max modular modeling to create buildings faster and more efficiently. In this tutorial, you’ll learn how to design a multi-family structure using modular techniques ideal for low-poly scenes and background assets.
Based on a breakdown by Agnieszka Klick from Arch Viz Artist.
Step 1: Begin Modular Modeling in 3ds Max
Start in Top view with a box:
- Length: 1200 cm
- Width: 2400 cm
- Height: 300 cm
Convert to Edit Poly and use Smart Extrude to create cutouts and projections. These will serve as the repeating floor module.
Step 2: Add Details to Your Modular Model
Use Inset to frame windows and doors, delete selected polygons, and manually adjust vertices. Apply a Shell modifier (Inner Amount: 45 cm) and turn on Straighten Corners.
Step 3: Stack and Mirror Your Floor Units
Instance the floor modules vertically and mirror alternate levels. Add balcony boxes and floor slabs using the same modular system.
Step 4: Finish the Roof with Booleans
Use Boolean objects for cuts and Chamfer to soften hard edges. With instancing, edits apply across all modules, speeding up your workflow.
Add Balcony Rails with Low-Poly Geometry
Draw a Line, Extrude, convert to Edit Poly, and chamfer the necessary edges. Use Shell for thickness, resulting in reusable, efficient railings.
Learn More
You can explore more content by Agnieszka Klick here.
The post Efficient 3ds Max Modular Modeling for Architecture appeared first on Ejezeta.
]]>The post AI-Generated Resources for 3D Rendering: Boost Your Visuals appeared first on Ejezeta.
]]>
In this RenderRam video, you’ll explore simple ways to make your 3D renders look more realistic using AI-generated resources for 3D rendering. These resources help you add photorealistic touches—without needing to use AI tools directly.
AI-generated resources for 3D rendering are compatible with major 3D software like Blender, 3ds Max, and Cinema 4D. As a result, they help you get better results faster, regardless of your skill level.
Whether you’re just starting out or already experienced, these practical ideas will help you bring more depth and realism to your projects. In other words, they’re perfect for anyone looking to improve their workflow using AI-generated resources for 3D rendering.
AI-generated textures, for example, can easily replace flat materials and provide depth and variation with minimal effort. Background elements like skies or landscapes, created with AI tools, can also add realism to your scenes. You can even use AI-generated reference images to inspire your lighting setups and camera framing.
The beauty of these tools is that they don’t require direct integration—you can simply use the outputs they provide and apply them creatively in your workflow. This means artists who prefer traditional software can still take advantage of the AI boom in a way that fits their process.
- Read more on 3D techniques here: Blender.org
- Learn how to integrate AI workflows: NVIDIA Omniverse
- Explore related AI tools for artists: RunwayML
- More tutorials and tips: Our AI-enhanced rendering guide
Start creating more realistic 3D renders today with AI-generated tools that fit perfectly into your pipeline!
You can check out more tutorials by RenderRam here!
The post AI-Generated Resources for 3D Rendering: Boost Your Visuals appeared first on Ejezeta.
]]>The post Realistic Water Shader with Caustics in 3ds Max and Corona Renderer appeared first on Ejezeta.
]]>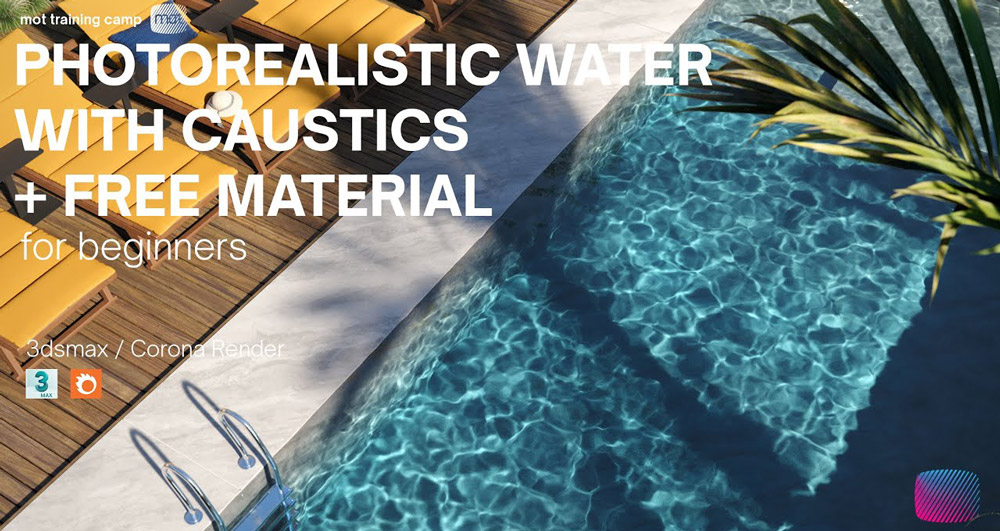
In this tutorial by Estudio MOT, you will learn how to create a realistic water shader in 3ds Max. You will also learn how to add caustics and volume materials using Corona Renderer.
The post Realistic Water Shader with Caustics in 3ds Max and Corona Renderer appeared first on Ejezeta.
]]>The post 4 Hidden Features in 3ds Max Revealed by Vjekoslav Kiraly appeared first on Ejezeta.
]]>
In Volume 17 of “Known Unknown Depths of 3ds Max,” expert Vjekoslav Kiraly from RenderRam shares four helpful, hidden tools in 3ds Max.
First, he covers “Ignore Extents.” This feature makes managing complex scenes simpler because it lets you ignore certain objects.
Next, he introduces “Ribbon – Fill.” With this tool, you can quickly fill gaps in your geometry. As a result, your modeling becomes faster and easier.
Then, Vjekoslav explains “Spline Quad Cap,” a useful feature for creating clean caps on spline shapes. This improves your models and their topology.
Finally, he discusses the “Spline Overlap” tool. This tool helps you fix overlapping spline segments easily, so your models become precise and clean.
Overall, this tutorial from RenderRam is perfect if you want simple ways to improve your architectural visualization workflow in 3ds Max.
The post 4 Hidden Features in 3ds Max Revealed by Vjekoslav Kiraly appeared first on Ejezeta.
]]>The post Bringing the spirit of adventure to life! appeared first on Ejezeta.
]]>
Georgian archviz artist Michael Khachaturyan, from Michael Archviz Studio, presents the Making Of for his latest project: Bringing the spirit of adventure to life!
Find out how he combined 3ds Max, Corona Renderer, Megascans and Forest Pack to make this project a reality.
The post Bringing the spirit of adventure to life! appeared first on Ejezeta.
]]>The post Back To Basics: Introduction To 3ds Max | Part 6 appeared first on Ejezeta.
]]>
Want to speed up your 3ds Max modeling workflow? Vjeko from RenderRam is here to help with a deep dive into essential precision tools that can transform the way you work.
In this tutorial, you’ll learn how to use snaps, mirror, align, and other powerful features to streamline your modeling process. Work smarter, not harder, and take your efficiency to the next level!
You can watch the rest of the series here.
The post Back To Basics: Introduction To 3ds Max | Part 6 appeared first on Ejezeta.
]]>The post 3ds Max scripts that could save you a lot of time appeared first on Ejezeta.
]]>
Vjeko from RenderRam shares 5 awesome 3ds Max scripts that will help you save a lot of time when working on your next project.
You can check out each script down below:
The post 3ds Max scripts that could save you a lot of time appeared first on Ejezeta.
]]>The post Stable Diffusion + ControlNET in Architecture appeared first on Ejezeta.
]]>
The YouTube channel ArchViz presents a great tutorial on using Stable Diffusion and ControlNet to explore different architectural concepts.
The post Stable Diffusion + ControlNET in Architecture appeared first on Ejezeta.
]]>The post How to create perforated panels in 3ds Max appeared first on Ejezeta.
]]>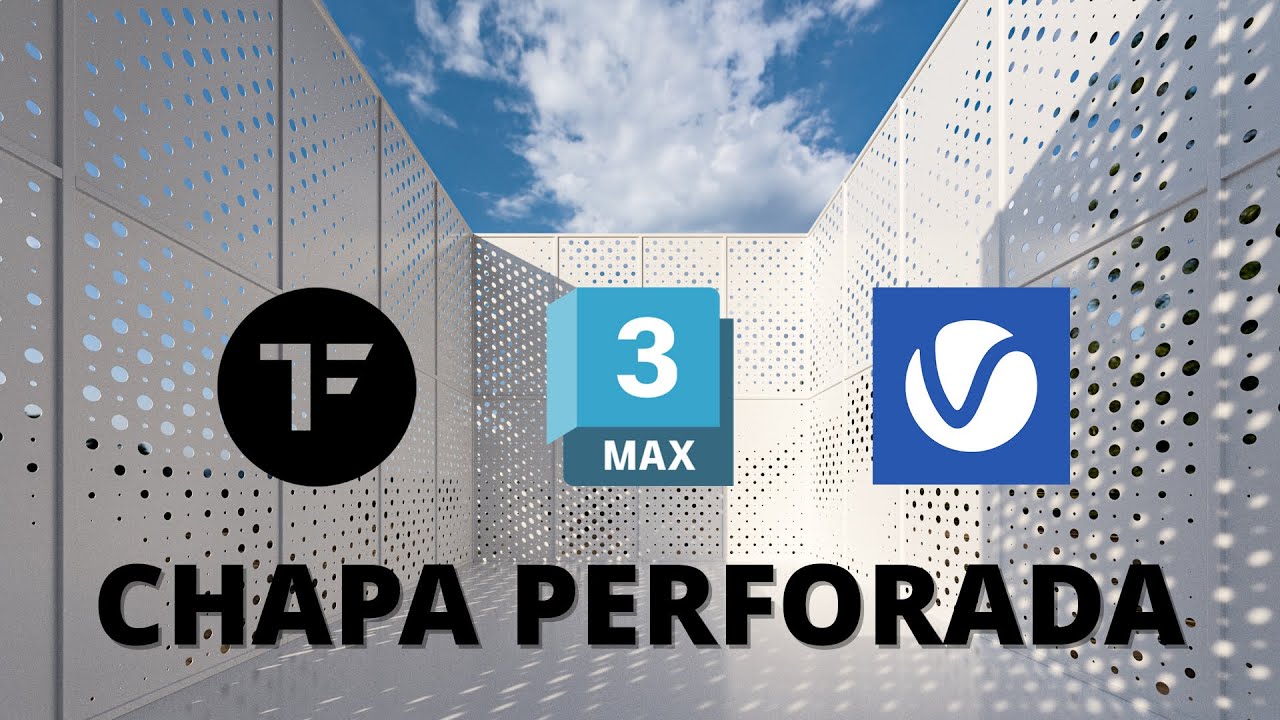
Adán Martin explains how to create customizable perforated panels in 3ds Max, controled by a map for defining the openness or closure of the holes.
The post How to create perforated panels in 3ds Max appeared first on Ejezeta.
]]>The post Back To Basics: Introduction To 3ds Max | Part 5 appeared first on Ejezeta.
]]>
Vjeko from RenderRam shows you how to create materials, apply textures, and set up realistic lighting in 3ds Max using Corona Renderer.
Learn to transform a simple doghouse into a photorealistic scene with practical tips on textures and sunlight. Perfect for beginners looking to enhance their 3D renders!
You can watch the rest of the series here.
The post Back To Basics: Introduction To 3ds Max | Part 5 appeared first on Ejezeta.
]]>